How to Fix Common Home Repair Problems

Mold, rot, and other water damage are relatively easy to spot, but other issues can be harder to identify. One of the most common problems is air leaks that can drive up energy bills. To repair a split, load a caulking gun with waterproof caulk and apply a generous bead into the crack. Smooth the caulk with a putty knife and wait 24 hours for it to cure. To learn more about siding repair, visit Siding Repair Charleston SC.

Siding Repair

Cracks in siding aren’t just an eyesore, they can allow moisture into the inner wall systems of your home. Moisture can lead to rot and mold, damaging your home’s internal parts. It can also increase your energy bills. Cracked and missing siding should be repaired immediately to avoid more serious issues.

Depending on the size of the crack, you may be able to fix it with a simple caulking job. This is a good option for small holes and cracks less than 1/16 inch wide. If the crack is larger than this, you’ll need to consider patching the area with a piece of matching vinyl siding. Before you start your repair project, clean the damaged area with soap and water to make sure it is free of dirt and debris. You should give the surface a couple hours to dry before moving on to the next step.

Use a caulking gun to put a bead of caulk around the outside edge of the cracked area. Smooth the bead with your putty knife to make it as smooth and even as possible. Use a color that matches the rest of your siding. Once the caulk is completely dry, paint over it with a brush to conceal the crack.

Holes and cracks in your siding can be caused by many things including harsh weather, holiday decorating mishaps, or simply age and wear. Regardless of the cause, they need to be repaired as quickly as possible to prevent rain water from seeping into areas behind your siding boards and causing wood rot or other interior damage.

Once the holes are filled and sanded down, you can use a paint specially formulated for exteriors to cover the repairs. Then, it’s important to apply a protective sealant or moss killer to the area to keep moisture and other elements out of your siding.

While this type of sealant isn’t as effective as caulk, it is a quick and inexpensive way to protect your siding. Choosing the right product for your needs depends on your budget, the severity of the damage, and how much time you want to spend working on your home.

Splits

If a split in your siding is the result of a nail that was hammered too hard, correct the underlying problem before repairing the cladding. Make sure the nails used are hot-dipped galvanized, which will give them the highest resistance to corrosion. You can also use stainless steel nails, which have a superior strength and durability. It’s important to always drill and countersink the nails before hammering them into place. This will minimize the likelihood that you’ll split the siding boards when you reattach them to the house.

Splits in wood siding can also be caused by moisture in the boards, particularly at the ends of the boards. These areas are more likely to absorb moisture and can lead to rot and insect infestation. The good news is that splits in cedar siding can usually be repaired and reattached. However, it’s important to remember that this is a job best left to professionals who are trained to inspect and repair siding.

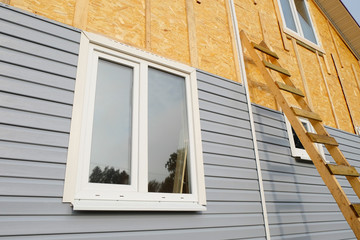
Vinyl siding can also develop splits in the panels from constant exposure to changes in temperature and humidity. This is because siding expands and contracts as it adjusts to the weather. Eventually, this puts stress on the siding, which can cause it to break apart from its neighbors.

Most vinyl siding repair kits contain special fiberglass cloth, which is embedded into a resin mixture to facilitate adhesion to the damaged siding board. This makes it possible to fix a split that would otherwise be too large for most vinyl repair techniques.

To repair a split in vinyl, first cut off any old caulk or paint that connects the broken panel to its neighbors. This can be done with a utility knife or power saw. Once you’ve removed the old caulk or paint, expose the fasteners that hold the damaged panel to the sheathing with a pry bar or claw hammer. You may need to use a hammer and screwdriver to loosen any nails in the panel.

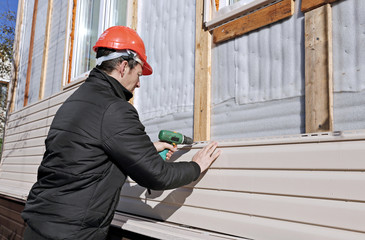
Once you’ve exposed the fasteners, remove the broken panel from the sheathing and cut a new replacement piece to size with a saw or utility knife. Once you have a replacement panel, install it by hooking it onto the bottom edge of the panel above it. Then, slide the top of the panel underneath the panel above it.

Dents

Aluminum siding is prone to dents, especially in high traffic areas. Fortunately, it is also fairly easy to fix. The first step is to pinpoint the center of each dent. Mark it with a fine-point marker or pencil. Then, drill a hole into the marked area with a metal drill bit. The exact size does not matter, but the key is to make sure that you only drill into the siding and not any underlying structure or support. Next, fit a sheet metal screw with a washer and then insert it into the hole you’ve just drilled. The washer will help you pull the screw out, and it will also protect the underlying metal from getting scratched as you do so. Pulling the screw will force the dent out with it, popping the panel back into place. If the dents are deep, you may need to use more screws to get them all out. Once you’ve removed the screws, apply a body filler to the holes, making sure that there is enough to completely cover the dents. A special aluminum-repair putty is ideal, or you can even use auto body filler if it is tinted to match the color of your aluminum.

Gently sand the filled-in areas once they are dry, being careful not to scratch up any other parts of your siding. If the filler or caulk shrinks while drying, reapply it and sand again.

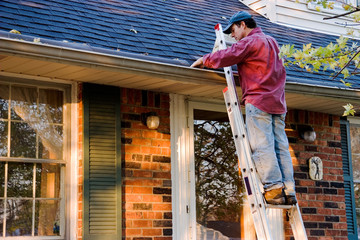
Wood siding is much harder to fix once it has been damaged, and dents in particular can be very difficult. If your wood siding is rotting, it may be necessary to replace the entire board. This is a much more involved process, and requires a professional, but it is possible. Generally, preventative maintenance will keep moisture infiltration to a minimum, and it is also a good idea to check regularly for cracks and looseness along old caulk seams.

While dents are less common on vinyl, they can still occur. If they do, you will likely want to remove the panel and replace it with a patch that matches your existing siding. The patch will be much easier to install if it is already in the correct position on the wall. This type of repair is best done by a siding contractor, as it will likely require the removal of several adjacent panels.

Stains

Stains in siding can occur for many reasons, from mildew to moss, algae, mold or smoke. They typically appear in areas that are exposed to sunlight and moisture. When this happens, the sheathing beneath the siding can become soft and water damage may occur. If a musty smell is present in the house or if the sheathing feels wet, it’s important to have it checked by a professional before it becomes a larger issue.

For minor stains, you can usually get rid of them with a bit of scrubbing and the right cleaner. If the stain is caused by a spill, clean it up as quickly as possible to prevent further damage and then scrub with a bit of mild detergent and warm water. If it’s a result of fungus or mildew, you may need to use chlorine bleach.

If the stains are older, it’s likely that the problem is more than a surface issue and that the sheathing underneath has been damaged by moisture and needs to be replaced as well. In this situation, epoxy putty is often used as a filler. When applied, it’s important to make sure the putty covers all of the affected area; don’t leave any voids. Once it’s dry, you can sand and paint the patch to cover up the repair.

The type of stain you use should be based on your goals, including how much natural wood character you want to show through and how frequently it will need to be reapplied. Oil-based stains are best for penetrating stains as they penetrate into the material and actually bond with the wood fibers to provide long-lasting protection. However, they have a higher VOC (volatile organic compound) content and aren’t as good for the environment.

Semitransparent stains let more of the natural color come through, but it will need to be reapplied every 2 to 3 years. Solid stains, which operate similarly to paint and will need to be reapplied annually, are also available. Hybrid stains are a more recent option that are intended to combine the benefits of both oil-based and water-based products.

Why Stucco Repair Is Important

Stucco is a fairly durable material that can last 100 years or more but needs to be maintained. It’s important to watch for any cracking or damage and have it repaired immediately. To learn more, visit Stucco Repair Philadelphia.

Stucco Services

Small hairline cracks can usually be fixed using exterior latex paintable caulk. However, if you see black stains, that’s usually a sign of significant water damage and a bigger repair project is required.

Moisture is a big problem for stucco because it can lead to mildew, mold and wall rot. These issues are more than just unsightly but can cause major structural problems and cost thousands of dollars to fix. A good home inspector or stucco remediation company will check your exterior walls to see if there is moisture intrusion. This process typically starts by looking at areas around windows as these tend to be the most common places for water intrusion in stucco walls.

If your stucco is still damp a week after it rains, it’s a sign that there’s a problem. You may also notice the formation of water spots that never seem to go away or a musty smell in your home. These signs indicate that water is penetrating your walls and could be caused by a leaky pipe, faulty gutters or even misplaced sprinklers.

Other common signs of moisture in your stucco are cracking and spalling. These are caused by expansion and contraction of the stucco due to moisture and weather changes. Normally, these cracks aren’t a sign of structural problems but if left untreated they can lead to wall rot.

A good home inspector or a stucco remediation specialist will use a probe test to determine the extent of moisture damage in your walls. This involves drilling a hole at each spot of suspected damage and inserting a probe to measure the moisture in the wall. This is the most accurate way to determine moisture levels in your stucco.

If your stucco has been damaged by moisture, the first step is to remove the damaged section of the stucco and any underlying lath. Once the damaged section is removed, a stucco repair professional will put in a patch using a cement that’s formulated for this type of application and matches the color of the surrounding stucco. Once the patch has cured, it’s time to paint. Stucco patches should be painted with a heavy-bodied acrylic elastomer that’s formulated to bridge hairline cracks and seal the surface. This product can be purchased at most hardware stores and is available in a wide range of colors.

As a building material, stucco is a highly durable substance that offers both beauty and functionality. Its longevity is tied to proper installation, with an emphasis on strict adherence to standards and codes. However, stucco is susceptible to stressors and environmental factors that can lead to its failure. This includes failure of rainwater disposal systems, which leads to excessive water penetration that can cause salt efflorescence and staining, or break down the integrity of the stucco itself, potentially causing cracks and collapse.

Moisture intrusion is another major problem that can impact a stucco system. If moisture is trapped, the result can be a multitude of issues including structural damage, mold and mildew growth, and dry rot around windows and door frames. Hidden moisture can also increase the likelihood of termite intrusion in a structure. These are all issues that can be addressed by a professional contractor through a process called stucco remediation.

A professional stucco repair company will start with an inspection to determine the extent of the problem and the cost to fix it. This may involve inserting probes in suspicious areas of the stucco walls to read moisture levels. This is a less invasive method than pulling the siding away in a small area, and can provide a better reading than using a moisture meter.

In some cases, the moisture issue is a simple one that can be corrected by adding a new layer of stucco with a waterproof sealant. In other cases, the moisture issue may be more significant and require a thorough stucco remediation.

Stucco repair works well on small, isolated problems such as hairline cracks or a specific section of crumbling stucco. It can be done on a DIY basis, but requires the use of some tools that many homeowners do not have. It is important to remember that even if only a single crack or area of damage exists, that these fissures can allow for water, pests and other debris to enter the building through these pathways.

Whether the issue is a few cracks, extensive damage to the surface of the stucco, or even complete plaster failure, a professional will be able to assess the situation and make a recommendation for repair and remediation. It is always best to have these types of issues handled early on to minimize the amount of work that will be needed.

If you are noticing cracks in your stucco walls it’s important to have these professionally inspected, as some cracks may be indicative of a larger problem. Some cracks are a normal sign of house settling, while others indicate a serious foundation problem. It’s crucial to have these inspected before attempting any type of repair as you do not want to mask the issue with cosmetic fixes.

When a stucco wall cracks it is often caused by a shift in the weight of a home. As a result, the soil around your home expands and contracts, pulling on the foundation of your house and forcing the walls to move. This creates energy that transfers through the foundation into the framing of your house, and then into the stucco. This creates stress on the structure of your house that over time, will cause it to settle and eventually crack.

Small cracks can be repaired by re-pointing the cracked areas with stucco cement and troweling it so that it matches the surrounding area. A good quality water-based paint will cover the patch and protect it from moisture. Larger cracks require more complex repairs. This involves removing the top layer of stucco along with the metal mesh that supports it. Once the metal is removed, you can examine the condition of the lath and make a decision about whether it needs to be replaced or not. If it does, you will need to nail down a layer of building paper and then replace the metal mesh.

Another option for repairing large cracks is to reapply the base coat of your stucco. This can be done by a professional or you can do it yourself with a product like Quikrete’s sanded acrylic caulk (view on Amazon). This is applied with a standard caulking gun, but rather than using a regular caulk, you’ll use a stucco-specific filler to ensure it will last.

Hairline cracks in stucco are common and can be repatched with joint compound. Wider cracks, however, are a sign of foundation settlement and need to be addressed as soon as possible before they worsen. Also, cracks in the foam trim used in stucco are often a sign that the seam was not properly connected and will reappear as thermal expansion and contraction occur.

When a stucco repair is undertaken, it’s important to use the right materials. The wrong materials can exacerbate the decay or even cause it to accelerate. The wrong paints may also insulate the moisture that should be allowed to escape. This stifles the natural evaporation of the moisture and creates an unintended negative effect: paint failure.

Stucco, like any other exterior material on a home, requires regular maintenance to prevent deterioration that will eventually affect the aesthetics of your house. Damaged stucco can become an open invitation for moisture, insects and rodents to make their homes at your home. It’s also not good for the structural integrity of your home.

One of the most common causes of paint failure on a new or repaired stucco is saponification. This is the chemical reaction that breaks down the bond between the paint and the surface. When this happens, water can permeate through the paint to the underlying stucco, causing wood rot and further deterioration of the stucco.

The best way to avoid this is to use acrylic exterior paints that allow the stucco to breathe and evaporate the moisture, rather than trapping it in the paint and causing a rotted mess. Another option is to seal the stucco with a waterproof caulk rated for outdoor use to keep moisture from entering the wall.

Using the proper cleaning techniques before painting can help, too. A pressure washer is the best way to clean stucco, brick and concrete surfaces because it blows dirt out of the tiny crevices. After the cleaning, a masonry surface conditioner can be used to restore and prepare the surface for painting.

When a stucco job is in the process of drying, it is critical to monitor pH level and moisture readings regularly. If these measurements are ignored, or the building is painted before they are read, the resulting paint may fail. This is especially true if the stucco was applied in hot, dry conditions or if it was not adequately wet down (hydrated) during cure.

The Basics Of Roofing

roofing

Roofing is the top covering of a building and consists of materials and constructions used to protect a building from the elements. Roofing materials are used in various constructions and are available in a wide range of prices and styles. It is the most important part of a building’s envelope, protecting it from weather and wind. To learn more about the basics of roofing, read on! Here are some basic tips:

Roofing Materials

Roofing materials are composed of two basic types: rolled and flat. Rolled roofing materials are made from asphalt or bitumen and are relatively cheap and easy to install. They provide a thin, light cover for the roof. Roll materials are often used for low-sloped roofs. They can be easily installed with torch-down methods or by using roofing nails. However, rolled roofing has its downsides. Here are some of the common types of roofing materials.

Depending on the location, different types of roofing materials offer varying degrees of weatherproofing. Many roofs are designed to offer more than one specialized function. While determining which type of roofing material is right for you, the climate of your region will be the determining factor. In some climates, dense materials are not recommended. For this reason, there are several different types of shingles. One type is called thermoplastic, which is great for areas where extreme temperatures are common.

Another type of roofing material is rubber. It is a durable material made of recycled tires. The lifespan of rubber shingles is approximately 50 years. A different type of metal roof is made of copper system shingles. The lifespan of the slate is 80-400 years, depending on the type of slate. Famous slate quarries are located in another country. Traditionally, tile roofing is made from local materials. Today, concrete is often used. A few types of metal roofing are available on the market.

Techniques

Using interlocking roofing techniques dates back to at least 10,000 B.C. in another country. They helped improve roofing technology and materials. In other places, the Romans favored red-tiled roofs, which were both beautiful and durable. Some red-tiled roofs can still be found today. Ceramic roofs are now common in many parts of the world. This solid material is extremely durable and weather-resistant.

There are many different types of roofing, each with its unique benefits and drawbacks. For the most part, however, simple roofs with moderate pitches are easily installable by the do-it-yourselfer with the right tools and knowledge. However, the technique to install different types of roofs will differ. In this article, we’ll explore some of the most common techniques for roofing. And while these are not a must-have for novices, they do require some preparation and knowledge.

The first thing to know when laying shingles is how to measure them properly. Roofing materials come in different sizes and shapes, and they must be matched to the roof’s structure. Be sure to take the time to measure and mark the shingles with a utility knife, or else you may end up with a roof that doesn’t fit right. And make sure to be aware of power lines and other underground utilities. A roof’s structural integrity can be compromised if the material isn’t installed properly.

Cost

Roofing contractors vary widely in terms of price. Overhead expenses, such as advertising, office expenses, equipment and fuel, and Workers’ Compensation insurance are common overhead expenses. These costs can range from 25% to 40% of payroll, depending on the state and past incidents. The type of roofing material that you choose will also affect your cost. In this article, we’ll discuss some of the factors that influence your costs and determine which roofing material is best for your home.

The quality of roofing materials is also an important factor. For instance, an architectural shingle will cost fifty percent more than a standard 3-tab shingle. Likewise, inexpensive materials may save you money, but they will not hold up to harsh weather. If you choose to install a cheap roof, you may end up paying for a new one in the future. Choosing the wrong material can cost you a lot of money, and it could even damage your roof.

Another factor that can affect your cost is your location. Whether you live in the country’s most expensive city or a small town, the climate will have a profound effect on the cost of a roofing project. Local legislation and permit fees also impact the cost of roofing materials. Lastly, you should consider your local economic conditions and competition when choosing a roofing contractor. If the market in your area is unstable, the cost of roofing materials can skyrocket.

Durability

Roofing materials vary in terms of their durability. Their expected useful life may be only 10 years or the entire life of a building. Durability not only affects the cost of construction for the owner but also has wider social and environmental implications. Approximately nine to ten million tons of asphalt roofing is disposed of annually in landfills. Longer-lasting roofing systems can reduce waste sent to landfills and improve the use of embodied energy.

The durability of roofing materials plays a crucial role in the flexibility and longevity of a roofing system. A two-layered membrane can help increase the longevity of a flat roof. But the material must be of the correct thickness and installed correctly to maximize its durability. In addition, the thickness isn’t always a direct correlation between durability and thickness. In some cases, less is more. Choosing the best material for your roofing system will determine its longevity and energy efficiency.

Roofing materials vary considerably in cost, durability, and aesthetics. Asphalt or cedar shingles typically last about fifteen to twenty years, while slate or metal roofing may last for fifty years or more. The cost of each material will vary depending on the location, but there are some exceptions. Also, remember that if your roof leaks, it may not require a total replacement. A simple fix to the leak might be to repair a faulty flashing.

Stone-Coated Steel

A stone-coated steel roof is a unique alternative to traditional asphalt or metal roofs. Stone-coated roofing uses metal or steel as the base material and attaches stone chips to the steel with an acrylic film. The purpose of stone-coated steel roofing is to create a more durable roof while still providing the aesthetic benefits of traditional roofing. To get started with stone-coated steel roofing, follow these steps.

The fire resistance of stone-coated steel roofing is the highest among roofing materials. It outperforms many natural materials when exposed to hot temperatures. This is because steel does not expand and contract as a result of extreme weather conditions. Stone-coated steel is noncombustible and carries a Class A fire rating. It also provides optimized protection from hail. The fire resistance of stone-coated steel panels can withstand hailstones up to two inches in diameter.

Stone-coated steel roofing is an excellent choice for those with extremely high winds and high wind risk. The interlocking panels prevent warping, curling, or splitting, and they won’t absorb water. And because they’re made of steel, stone-coated steel roofing is recyclable. The panels are 100% recyclable. They’re a fantastic choice for homes located in earthquake zones. And best of all, stone-coated steel roofing can also withstand harsh climates.

Wood

Among the different types of roofing materials, wood is used extensively in construction. It has historically been used in residential buildings. While it may be the most economical choice in the past, the process of installing wood roofs is now highly technical, requiring extensive technical training and experience. Nevertheless, wood roofing provides a unique and elegant design structure for a building, lasting for many years. Here are some tips for choosing the right wood for roofing.

First of all, it is important to determine the area to be covered by a wooden roof. Generally, the area of the roof can be estimated by dividing the total area of the wooden tiles by their length. The inclination of the roof should be less than 14o or higher than 18o, as the slope increases with the amount of wood used. Secondly, roofers consider the amount of slope between 18 and 90 degrees. This inclination can greatly impact the lifespan of the roofing material, so a margin of ten to fifteen percent is necessary.

Cedar is the most common type of wood used in roofing systems. With proper care, cedar wood shingles can last up to 40 years. Additionally, many manufacturers treat wooden roofs with fire-resistant chemicals to protect against fire. If you are looking for a natural wood roofing material, cedar is an excellent choice. However, you should make sure to research each type before deciding on a particular wood for your roofing project. There are a lot of different kinds of wood available, and each one has its unique qualities and benefits.

CATEGORY: ROOFING

TAGS: roof repair, roofing company, roofing contractor, roofing maintenance, roofing services

Benefits of Hiring Professional Hardwood Flooring Installers

Whether you are building a new home or remodeling your existing one, hardwood flooring will dramatically improve the look and feel of any space. It also increases the value of your home. You will want to hire reputable professionals when installing your new floor. Knowing the factors that go into hiring a good hardwood floor installation company is important to ensure you get the best results.

Hardwood Flooring Installers

Hiring a professional is the best way to get the job done quickly and efficiently if you have decided to install new hardwood floors in your home. There are many benefits to hiring a professional. Still, the main one is that they have a wealth of knowledge about flooring and can complete the installation more timely and efficiently than you might be able to do yourself.

Hardwood floors are available in different styles and sizes, so hiring an experienced professional who can match your particular space with the flooring product is important. They can also help you decide on the best type of hardwood for your space and advise you on maintenance and upkeep.

It’s also a good idea to find out what kind of warranty is offered by the company you plan on using. A good hardwood flooring installation company should offer a labor, material, and service warranty that will protect your investment in the floor.

Another benefit of hiring a professional is that they have the right tools to do the job quickly and efficiently. Installing the floor yourself may take you longer and require you to buy additional tools.

Once you’ve found an installer you like, asking them how long they have been in the business is a good idea. This will help you gauge their expertise and see how reliable they are.

An installer with a good reputation is usually very willing to answer your questions. This is because they have a lot of customer experience and know how to promptly provide accurate information.

For example, if you call an installer for an estimate and they can’t answer the phone within hours or don’t help answer your questions, this is a sign that you should move on to someone else.

A good hardwood flooring installer will also keep your subfloor dry and clean while they are working. This is essential for hardwood since moisture can cause the floor to warp and lose its integrity. It’s also a good idea to look for a contractor who will level the subfloor as needed before they begin work on the hardwood.

Warranties are a key part of the sales process, helping customers know that they will be able to get the flooring they need if something goes wrong. They also help retailers build trust and develop a loyal customer base.

Many types of warranties are available, including structural and finish warranties. It is important to understand these and what they cover so you can decide if you want to go through with the installation.

A structural warranty, which is usually offered on engineered floors, guarantees that the flooring will not warp, buckle or twist under normal household conditions and that the product was properly installed to the manufacturer’s specifications. It is very important to follow these instructions, as failure to do so can void your warranty.

If you’re unsure of what your warranty covers, ask the representative at the store to walk you through it. They’ll be able to determine whether the issue is a product or installation issue, and if you need to file a claim, they’ll give you the information you need to submit it.

In addition to the structural and finish warranties, many hardwood floor products offer other warranty options. They may offer a limited finish warranty, which generally comes with terms like “if installed in compliance with our installation instructions” or “in accordance with normal household conditions.”

These warranties are important because they provide an additional level of confidence to customers who want the peace of mind that their new floors will look great for years to come. If you find that your flooring is damaged, make sure you keep all the documentation from the installation in order to support your claim when it comes time to file a damage claim with your retailer or installer.

The warranty also provides you with the information that you need to report a damage claim. You can call your local flooring retailer to schedule an appointment for a representative to inspect the damage and see if it falls under your warranty.

While it can be tedious to read through the details of your warranty, it will pay off in the long run. You’ll be able to see any limitations and exceptions, as well as the disclaimers that can void your warranty, and it will make you more aware of what you should be looking for in flooring.

If you’re planning to install hardwood floors, it is important to have a smooth and level subfloor. Having a sloppy or uneven subfloor can cause squeaks and crooked boards when the floor is installed.

Hardwood flooring installers have experience preparing subfloors and can help you make sure that your floors are level before they begin installation. Their prep services will reduce the amount of time it takes to complete the installation.

* Check the subfloor for dips and high spots that are greater than 3/16 inch over an 8-foot span. If you do find any, sand them down and fill them with leveling compound. Using leveling compound ensures that the floor is flat and smooth when installing wood planks.

The subfloor should also be free of dirt, dust, and other substances that could interfere with the installation. If any of these substances are present, the job will take longer and more costly to complete.

It is also a good idea to use a long level and tape measure to check the subfloor for any irregularities. These irregularities should be less than 2mm per 1 meter and less than 1 mm for 20cm.

Before the floor is installed, the subfloor should be swept and vacuumed to remove any debris from the surface that could affect the installation. Then, use a trowel and some leveling compound to make sure that the surface is level.

After sweeping the floor, walk it over and listen for any squeaks or rumbling sounds that may indicate a weak spot. If the subfloor has any holes or cracks, repair these before the installation starts.

Lastly, make sure the concrete slab is clean and dry. It should be free of any salts, water beads, or other contaminants that might interfere with the bonding of the thin-set used for the installation.

Before your installation begins, make sure that all furniture and personal belongings are moved to another room or covered with a drop cloth to avoid them being damaged during the process. In addition, prepare a dust containment system to help prevent the spread of dust and other particles to other areas of your home during the installation.

Hardwood flooring is a major investment, and the installation process can be costly. However, the return on your investment is very high, as hardwood floors add value to your home and are highly desirable by potential buyers.

There are several things you can do to save money on your wood flooring project. For example, buying prefinished flooring is cheaper than installing it yourself and can help you save time and energy. It also allows you to choose your own color and wood type.

Another way to cut costs on your hardwood floor project is to hire a professional to remove the existing flooring and prepare the subfloor for installation. Typically, this costs between $4 and $10 per square foot.

The cost of labor and material also play a role in determining the total price of your flooring project. For smaller spaces, labor costs run between $6 and $12 per square foot, but this can increase to $13 or $25 for larger areas.

Materials make up the majority of a wood flooring budget and include the floor itself, underlayment, and any trim or transition pieces. These materials can range in price from $4 to $20/square foot, depending on the type of wood, how it is finished, and any special design options you may want.

You can often find good deals on hardwood floor installation by shopping around and comparing quotes from different companies. You can also find free estimates from licensed experts in your area.

One of the best ways to estimate the cost of a wood floor project is by using a general rule of thumb: take the purchase price of the flooring and materials and add 50 percent for the labor cost.

It is important to note that the amount of labor and prep required for your project can add up quickly, especially if you need to remove old flooring or pour self-leveling concrete to fix low spots in the subfloor.

If you’re on a tight budget, you can still enjoy the look of hardwood flooring by choosing alternative options like vinyl or laminate flooring or porcelain tiles. These products mimic the look of solid wood but are far cheaper to install. These alternatives also don’t detract from the aesthetics of your home.

Things to Look For in a Roofing Expert

Having your home or office roof repaired is a very important task, and you need to hire a roofing expert to do the job. Here are some things to look for in a roofing professional.

Roofing

Getting a job as a roofing expert is a challenge. You need to have a hefty swag bag and be willing to put in the hours at the office. Luckily, plenty of resources are out there if you do your homework. You can find a roofing company in your area but do your research first to ensure you hire someone who will do the job right the first time. You may even get a free roof repair. Keeping your clients happy is the best way to stay in business.

There are many things to do while on the job, but if you have a good plan, you can minimize damage to your property while maximizing productivity. For example, hiring someone responsible for completing your roofing project before the weather turns bad is a good idea. Likewise, you can avoid putting your money where your mouth is by ensuring you have the appropriate equipment. This is important for safety purposes and ensuring a streamlined workflow when it comes time to pay for the bill.

Roofing contractors with expert roof certifications give homeowners peace of mind. Not only do these certified professionals offer excellent service, they can also protect customers from costly mistakes.

Manufacturers of roofing materials test contractors for knowledge of their products and installation techniques. They award prestigious certifications to contractors who demonstrate the best knowledge.

The roof is a very important home component, as it is the first line of defense against precipitation. When a home buyer purchases a new home, they will often request that the roof be certified. This certification is often a requirement by mortgage companies, insurance companies, and buyers.

Leading material manufacturers, such as Owens Corning, GAF, and CertainTeed issue these certifications. Each state has its own certification program, but many requirements are similar across the board.

Roofing contractors with expert roof certifications undergo extensive training and are held to high standards. They must show expertise in installing manufacturer’s products and meet local licensing requirements and good business practices. This can lead to a more reputable company with higher customer satisfaction.

Having a roofing expert install a new roof is nice, but you may need to be made aware that a maintenance plan is the best way to keep your investment in top condition. A well maintained roof will save you time and money down the road.

The best maintenance programs are designed to identify minor problems before they become major headaches. In addition, the most experienced and knowledgeable roofers can recommend a number of improvements, such as insulation and drainage. The most important consideration is to find a trustworthy contractor to make the right recommendations for your property. Having a good relationship with your local roofing expert will help ensure a smooth installation. The resulting roof is less likely to suffer damage, reducing costs for repairs and future upgrades.

The most obvious reason to have a maintenance plan is to reduce the risk of fire, and other catastrophes that could lead to costly damage and loss. A maintenance plan will also provide peace of mind knowing that your roof will be properly handled. In addition to the benefits as mentioned earlier, a warranty will cover your roof if a catastrophic event occurs.

The cost of hiring a roofer can vary depending on the type of roof you have and how much work needs to be done. The type of material used will also determine the price. Asphalt shingles are the most common roofing material, but other materials can also be used.

In addition to the cost of the material, you should also consider other material expenses. For example, chimney flashing can add $200 to the bill.

A foam roof repair kit can save you up to 50% of the cost of hiring a roofer. A foam roof over an existing roof is called a roofing-over. These kits range in price from $250 to $750. Depending on how well the roof is maintained, the roof can last up to fifty years. Roofing can be difficult, but a good roofer can make the job easier. They will be able to evaluate the job and give you an accurate estimate of how long it will take.

5 Steps to a Successful Bathroom Remodel

A bathroom remodels is a great way to increase your home’s value. It also has a positive impact on your family’s comfort and safety. You’ll want to choose a trustworthy remodeling company with an excellent industry reputation. Then, you’ll enjoy the benefits of a new bathroom for years.

Bathroom Remodeling

The layout of your bathroom can make a difference in how you feel and use the space. Whether you have an expansive master bath or a small powder room, the right plan can transform your bathroom into a tranquil retreat. For example, one popular design is a 9×5-foot layout with a sink, toilet and tub/shower combination lined up next to each other. This narrow floor plan is efficient and helps reduce plumbing costs.

Another layout uses partition walls and a pocket door to create a private alcove for the toilet. This is a great option for homes where multiple people use the bathroom simultaneously. This layout also takes up more space than the previous design but provides more flexibility for how the space is used. It’s also a more expensive option because of the additional plumbing work and square footage it requires.

Fixtures and appliances are the heart of a bathroom remodel. They provide functionality and aesthetics and are the key to a remodeled bathroom that matches the home’s design and tastes. For example, if your home is a traditional style, choosing a set of bathroom faucets with traditional handles and matching lighting fixtures will create a cohesive look for the room.

If you’re renovating a more contemporary or transitional home, a more streamlined look can work better for the space. This is especially true if you’re replacing old fixtures with modern ones with a similar style and material to match the current architectural theme of your house. In addition to updating the fixtures, you can add a few features to increase your property’s value. For instance, you can switch out the plumbing for a more energy-efficient system or install new electrical outlets for more convenience.

Bathroom lighting is an often overlooked element of a bathroom remodel, but it plays an integral role in making your space feel more comfortable. Bad lighting can quickly make a small bathroom seem cramped and dark, while perfect lighting can make the room feel inviting and revitalizing for your morning and evening routines.

Whether you’re looking for traditional or contemporary bathroom lighting, plenty of options exist. These include ambient, task, accent, and recessed lighting. Ambient lighting provides soft, even illumination of the entire room. It’s ideal for bathrooms that don’t have a lot of natural light.

Bathrooms are often the most water-prone rooms in a home, which makes them the perfect place for waterproof flooring. Whether it comes from overspray, leaks, or children’s splashing, your floors must be ready to stand up to the abuse that will come with daily use.

For this reason, it’s important to find a waterproof floor that will match your design and style. While there are many different types of flooring, the two most popular are stone and vinyl.

Tile is an easy, budget-friendly choice with many shapes, colors, and designs. Natural stone such as marble and granite are highly durable and luxurious, but they can be expensive. Engineered wood is also a good option, but it can be vulnerable to moisture damage and requires professional maintenance for long-lasting beauty.

A fresh coat of paint can help you breathe new life into your bathroom. But picking the right color and finish is important to match your bathroom’s style. The first consideration in bathroom paint selection is moisture resistance. This is particularly true in the shower or tub area, where steam from baths or showers will inevitably gather on the walls.

If you are planning a major remodeling project, consider a generator for the project’s duration. You should also arrange for the storage of supplies and materials during construction. Be sure to research local codes to ensure your project does not violate regulations. If you plan to relocate fixtures, getting building permits as early as possible is essential. For example, if you plan to remove a bathtub, you will have to reroute plumbing lines. The new location of your bathroom should highlight the opening door and the shower and sink. Colors should be muted, preferably white, but you can go bold and use brighter colors if you want to.

How to Choose the Right Siding for Your Home

Siding is one of the most important components of a home. It protects your house against harmful weather conditions and increases its resale value. A new siding replacement can dramatically improve your home’s appearance and give it a fresh feel. Siding will also help keep your energy costs down and make your home more comfortable.

Siding Contractor

Siding is a protective covering for a house’s exterior walls. It is usually made of wood or vinyl and is attached to the exterior side of the wall. The main purpose of siding is to protect the home against environmental factors. It also looks good, but there are many other benefits to choosing the right material for your home. 

Siding material comes in wide different varieties. There are many types of siding material, and some require more maintenance than others. Make sure to read the manufacturer’s instructions carefully before making a decision. The most important thing to consider is the type of finish you would like to get. You can choose from a clear sealant or a semi-transparent stain to bring out the wood’s natural grain. Premium stain-grade wood should also be free of knots and other imperfections. On the other hand, lower-priced grades are best for painting or opaque stains. While paint may cover imperfections, it can also be expensive.

Vinyl is a durable, low-maintenance exterior home cladding material that is available in a wide range of colors and profiles. It has been around for decades and remains a popular choice for homeowners looking to update the look of their homes. Vinyl siding is made from heated polyvinyl chloride (PVC) infused with color-infusion blending and then extruded. The resulting product is durable, insect-proof, and fade-resistant.

It is also incredibly energy efficient. Some options have superior insulating properties, which can help reduce the need for indoor heating and cooling, thereby helping to reduce utility bills. Many of today’s premium products offer excellent performance in extreme weather conditions while maintaining exceptional aesthetics and requiring little maintenance. This makes them an ideal alternative to wood and fiber cement which may require restaining or painting for a high upfront cost.

Siding can be a significant part of a home’s appearance, so choosing the right material is important. Many options include brick, stone, stucco, and metal. Steel is an option if you’re looking for a siding that can withstand harsh weather and last a long time. This strong material is not susceptible to mold and insect damage and will also stand up well to freeze/thaw cycles, common in many regions of the country. It’s also waterproof, insect-proof, and fire-resistant. Steel is also a durable choice that offers a low upkeep cost, so it’s ideal for homeowners who want to focus less on maintaining their exteriors.

Stone siding is a durable and versatile type of exterior covering. It offers a variety of benefits, including low maintenance and insulation. Unlike other types of siding, stone can be easily customized to match your style, the aesthetics of your neighborhood, and more! There are many options to choose from, including rough and irregular textures to create a rustic look for your woodland home, or smooth panels that provide a polished touch for your high-end estate.

The main benefit of stone is that it can help regulate your home’s temperature in winter and summer. This can save you money on your energy bills! It also helps prevent ice dams from forming on your roof, which can cause major damage to your home’s exterior. This is especially important in colder climates, where ice dams can harm your health and safety!

Stucco siding is a durable, low-cost way to enhance the exterior of your home. It has a wide range of textures and pigments, giving you an option for nearly any style or aesthetic. Traditional stucco is made with a mixture of cement, sand, lime and water. Glass fibers and acrylics may be added for added strength and durability. To apply traditional stucco, contractors spread a thin layer of the mix over metal lath attached to a house’s exterior sheathing. Then, they apply a “scratch coat” layer to help the stucco adhere.

Then, they add a brown coat that reinforces the stucco’s structure and prepares it for the final coat of colorants and texture. This final coat is usually hand-troweled for a custom surface texture. Stucco has many advantages over other siding types, but it can also have its own downsides. For example, it does not insulate well and can stain if it is constantly exposed to water.

Interior Design Styles

interior designing

Interior design is a field that deals with the design of spaces. It aims to improve the quality of life by creating comfortable and appealing environments.

A professional interior designer should be highly knowledgeable and have a strong understanding of space planning, color, lighting, and more. Interior Designers also have a creative flair for turning a space into something unique and beautiful.

Modern Style

Modern style is defined by a neutral color palette, clean lines, and functional furnishings. It focuses on function and form over opulence, and it uses natural materials like stone, wood, and leather to create a welcoming, inviting, and comfortable feel in your home.

The main feature of this style is the use of natural light to bring in a spacious and vibrant vibe into your home. The neutral color scheme also makes it easy to brighten the space up with pops of color from furniture and accessories.

Unpainted wood, leather, metals, and glass are all common elements in modern design. This is one of the reasons why it has a high popularity rate among home decor styles in 2020.

Industrial Style

Industrial interior designing is a style that combines raw and rough materials with modern elements. This gives the space a rustic, utilitarian look that is inviting and relaxing to live in.

One of the most popular features of this design is its emphasis on natural light. This allows the room to be bright and airy while also creating an atmosphere of comfort and warmth.

Another important characteristic of this style is that it favors leaving certain architectural and mechanical details exposed, rather than concealing them as other styles do. This includes original brickwork, pipes and ducts.

Lighting is a key feature of this style, and Edison bulbs, dark metal pendants and sculptural LED fixtures are ideal choices. You can even choose vintage lights in cool metallic shades to complete the look.

Traditional Style

Traditional style interior designing is inspired by the past, and it’s a great choice for those who want to adorn their homes with antiques, classic art, and design rich with history.

The color palette for traditional design usually starts with neutral walls, but accents and textiles can help pop a room. You’ll see a lot of rich jewel tones like red and green in this style, as well as brown and dark wood tones.

In terms of light fixtures, a traditional style space often features large crystal chandeliers, highly decorated sconces, and sculptural table lamps. They’re chosen to stand out in the room and work perfectly with traditional furnishings.

As with other styles, you can mix and match traditional pieces to create a look that’s unique to your home. Start by clearing out modern pieces that don’t have a defined period and swapping them out for pieces with character that you love and are compatible with other periods of design.

Eclectic Style

Eclectic style is a fun way to bring multiple design styles into one space. This style blends different designs, colors, and textures to create a stylish yet cohesive look.

Mixing different elements can be tricky, but it is possible to achieve this with careful planning and curating. Creating balance and harmony in an eclectic design requires layering textiles and adding accents that compliment the overall theme of the room.

Another important consideration when creating an eclectic style interior is not to overdo it. It can be easy to let eclectic design flow into a messy and cluttered room, but keep things in check.

Instead of having a shelf full of ornaments or a floor covered in sentimental pieces, showcase your most prized possessions and keep the rest of the furniture in the room simple. This will give your space a more professional feel without compromising the eclectic style.

Roofing Materials and Styles

When it comes to roofing, homeowners need to consider both style and material. They must choose a material that will not only look great but also function well for their area’s weather patterns over time.

roofing

Hot climates require roofs that are designed to release and not absorb heat. This can include tile, shingles, metal, and slate roofs.

Metal roofs are an increasingly popular roofing material for a variety of reasons. These include their longevity, low maintenance, and energy efficiency.

Steel and aluminum are the primary materials used for metal roofing, but other options such as copper, tin, and zinc can also be found. Unlike traditional asphalt shingles, which oxidize and break down quickly, metal roofs are built to last decades with little or no maintenance.

Depending on the product, metal roofing may be coated with various finishes to prevent rust or other damage from water and air. This can be a good choice for homes located in regions with high rainfall or where the climate is particularly harsh.

The type of metal used for a particular roof depends on the home’s location, architectural style, and homeowner’s budget. Often, the most affordable option is aluminum, which is lighter and more flexible than steel and does not rust.

When choosing a metal roofing product, make sure it is properly tested and labeled by an organization that complies with rigorous wind, fire, and impact resistance requirements. 

Metal roofs are available in a variety of styles and colors. Some are stamped into shapes and installed as interlocking panels with hidden fasteners. Others are standing-seam systems that resemble shingles or tiles.

These styles are available in a wide range of colors and can be matched to most architectural styles. Several metal roofing products also offer a stone-coated look, in which granules of stone are embedded in the paint.

Regardless of the type of metal you choose, be sure your contractor follows the manufacturer’s instructions for installation. If your contractor doesn’t, rainwater could seep into the screw holes in the panel and cause a leak.

A good-quality metal roof will have fasteners that are hidden from view, or at least concealed behind a special resilient wash that is applied to the screw heads. Exposed fasteners are more vulnerable to improper installation and can dislodge over time.

Asphalt shingles, or “composition” shingles, are a popular roofing material for homes and businesses. They are available in a variety of colors, styles, and thicknesses. They can also be treated against mold and mildew.

They are made from a fiberglass mat, asphalt, and mineral granules. They are lightweight, durable, and easy to install.

The fiberglass mat is bonded with stable resins and binders to make it strong enough to hold the asphalt and granules that form the surface of the shingle. The shingles are then sealed with an asphalt sealant that activates at specific temperatures. This helps prevent the shingles from sticking together while they are being manufactured and when they are stored in the warehouse or at the job site.

Shingles are shaped and cut to fit your roof’s slope. They can be trimmed to match the roof’s contours or have special shapes like a square, rectangle, or even a diamond. They are also available in a variety of textures and colors.

They have a specialized asphalt coating that helps them resist water and snow. They are also fire-resistant, and their mineral granules deflect harmful, roof-damaging UV rays.

Some asphalt shingles have algae-resistant or reflective granules that inhibit the growth of blue-green algae that can cause discoloration on your shingle roof. These shingles can also help keep your energy bills down by reflecting heat from the sun.

In addition to these features, they are resistant to rot and mold and can last for up to 50 years. They also come in a variety of color options and a wide range of prices, so it’s easy to find the right shingles for your home or business.

Most asphalt shingles are impact-resistant, meaning they are less likely to break under heavy impacts such as hail. They also have a Class A fire rating, meaning they are highly resistant to burning.

ENERGY STAR-qualified asphalt shingles are another good option for homeowners looking to save on their energy costs. They can qualify for a tax credit.

Asphalt shingles can be installed over existing roofs and new construction. They are one of the least expensive roofing products and are readily available from many manufacturers.

Gutter Cleaning – Why You Should Hire a Professional

If you’re in the market for gutter cleaning, it’s worth considering the services offered by a professional. By doing this, you can protect your property’s exterior from damage.

Gutter Cleaning

Gutter cleaning can be an expensive undertaking. But if you still need to get it done, it can lead to a number of problems, such as flooding and property damage. The cost of gutter cleaning depends on several factors. This includes the size and height of your home, the type of gutter you have, and the amount of debris in your gutters. Depending on your needs, a technician can estimate your cost.

Some companies offer discounts for regular maintenance, which can cut overall costs. Typically, a company will charge by the hour, but they can also charge a flat fee for a one-time cleaning. A few companies even offer loyalty programs. These programs may be a good deal for you. Getting the best possible price for gutter cleaning isn’t impossible. However, it does require some research on your part. If you take the time to do your homework, you can save money and get the job done right the first time.

A clogged gutter can cause a lot of damage to your home. It can lead to rotted wood, flooded basements, and overflowing water. In addition to the potential physical damage, a clogged gutter can also be a health risk. Pests such as ants and rodents can use a clogged gutter as their own habitat. This could result in an infestation and expensive repairs. Clogged downspouts are the most common source of gutter problems. They are designed to catch and redirect water away from the home. However, if debris is able to find its way into the downspout, it can block the outlet.

The weight of debris can cause the gutter to bend. If the clog extends further along the pipe, it will overflow. Besides causing physical damage, a clogged downspout can also take part of your roof with it. Clogged downspouts can be removed by disassembling the pipe and using a plumbing snake. Alternatively, you can remove the clog by applying pressure on the downspout with a telescoping wand or a pressure washer.

Preventing damage to your home’s exterior. Gutter cleaning is a home maintenance task that should be done at least twice a year. This is because debris accumulates over time and can cause your gutter system to malfunction. A clean and properly working gutter will prevent major damage to your home. A quality gutter system can last you for years. However, if not kept up, it can cause a number of problems, including water leaks. As a result, you may end up with excess water that finds its way into your basement, wooden framing, and even your attic. The worst part is that the water can even penetrate the ceilings.

When a clog occurs, the resulting rainwater overflow causes considerable damage to your home. Not only can the water damage your foundation and roof, but it can also lead to mold infestations in your basement. Fortunately, preventing a clog is relatively easy. Cleaning your gutters is a simple task that should be performed at least twice a year. You should inspect your system for leaks, cracks, and loose nails during this time. While you’re there, you might as well check for overhanging branches that can block the flow of rain.

Hiring a professional to clean your gutters. There are many benefits to hiring a professional to clean your gutters. Not only will you get your gutters cleaned and sealed properly, you’ll also be able to prevent water damage. A professional can inspect your gutters for potential problems, such as rust or poor drainage. This could save you hundreds of dollars in repairs.

Professionals also have the right tools to do the job, and can prevent future problems. Clogged gutters can cause water to leak into your home, causing expensive damage. Your foundation can also be damaged. Water can also pool around your house and cause damage to your walls. If your gutters are clogged, they can even attract harmful pests. Pests love moist and dark places to live. They are especially attracted to gutters that are filled with debris. The primary purpose of gutters is to direct water away from the house. However, overflowing gutters can lead to soil erosion. Additionally, water can damage your roofline cracks. Ice dams can also form.